Living in the smallish house that we do, and having the majority of our free space consumed by baby paraphernalia, there isn't a lot of space left for things like, say...an office for me. Alright, forget an office, I'd settle for a small desk in a corner. But even that seems near impossible.
No, these days my 'zone' (as my husband likes to call it) is spread out all over the couch in our living room. Laptop, iPhone, notepads, pens, coupons, flyers, lists, notecards...you get the idea.
Here's a visual for you.
I'm constantly piling up my stuff and shoving it out of reach when our little guy is not napping or down for the night. Not exactly pretty or organized.
An 'office in a box' was in order. Something that would keep all my little items contained and organized. It just so happened that this great box was stored away in the basement with my gift wrap supplies. Perfect!
I have been holding onto this box for a few years now, knowing that one day it would come in handy.
I almost tossed it a couple of times, but those handy compartments inside would call out "Keep me! Keep me! I will be useful one day, I promise!"
I wanted to update the fun/cheery pattern on the outside to something a little more modern and mature. It would be great to have it match our living room decor since that is where the box will be living.
My plan was to cover it with some pretty Martha Stewart wrapping paper that I scored for a great deal at Michael's craft store a few years ago when they were clearing out her gift wrap line (I stocked up). Then cover with clear Contact shelf liner for durability.
I also found some adhesive metal label plates on clearance at Michael's. Perfect for the outside of my box!
Inside, I wanted to increase the box's usefulness, so I planned to add magnetic stick-on pieces (from the dollar store) and a corkboard (cut out from an Ikea cork hot pad).
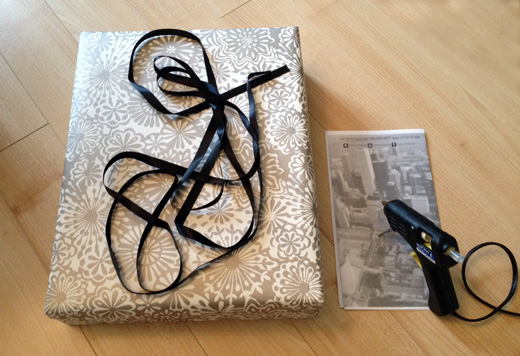
So I set to work covering with paper. I didn't do any fancy measuring, just placed the box on a large piece of wrapping paper and cut to size as needed, adhering it to the box with double-sided tape. The corners were a bit tricky, but it all turned out I think.
Some black ribbon adds a nice touch around the edge of the lid. I dug in to my scrap ribbon box and brought out the glue gun for this step.
Next, it was time for the Contact paper. Thankfully, it wasn't as tricky as I thought since the adhesive paper is actually somewhat removable. So, when it didn't go on just right, I was able to adjust it without wrecking anything. That made me very happy.
And now... here is the finished box with label plate.
And here's the inside, all ready to be filled up with my office 'stuff'. (I had to add a few more magnetic pieces than originally planned so it was strong enough to hold my magnetic notepad in place.)
Ahhhh, organization. I love it!
And look how pretty it looks on the shelf in our end table beside the couch. The accordion files on top of the box now hold my weekly grocery flyers and coupons.
Much better than the former chaos don't you think?
I'm linking up with these great link parties this week. Be sure to check them out!


Found your post through diy dreamer's linky party and wow! What a cool way to organise. I'm definitely pinning this up for my dorm room. :)
ReplyDeleteJaveriya
http://believeninspire.wordpress.com
Thanks for stopping by Javeriya!
DeleteLove it, and miss YOU! :) - Raine xx
ReplyDeleteYou're so great at this...look awesome! Love the idea of the cork inside ...:)
ReplyDeleteThank you Lucy. I'm excited to share it at Happy Hour this week!
DeleteJust dropping in from the picket fence to see this awesome office in a box:) Just pinned!
ReplyDeleteThanks for pinning Evelyn! Glad you like it.
DeleteWhat a great idea, we don't have room for a formal office at our house either, although I do have a desk in my living room. This is a great idea to keep everything you need close by and pretty!
ReplyDeleteThanks for linking up last week, we'd love to have you back!
http://www.joyfulhomemaking.com/2012/11/welcome-to-think-tank-thursday-5.html
Thanks Margo!
DeleteWhere'd you get the box originally? I would love to do this!!
ReplyDeleteJess Primmer
Hi Jess! The box was originally filled with assorted greeting cards. I received it as a gift years ago. I think it may have originally come from Costco.
DeleteAny idea how I could recreate that type of box? I am craft-challenged!
DeleteI would look at the dollar store for some sort of drawer organizers that could fit in an empty box. I think Solutions Store also has drawer organizers and nice lidded boxes, but it would be more expensive there. Good luck!
DeleteI love the wrapping paper, and I love using old boxes too! Good job!
ReplyDeleteI love it! I've made a number of things using white foam board and a hot glue gun - I think that might be how I accomplish my own office box. It will come in handy for my graduate school tiny apartment. Thanks! www.baileymarieandme.weebly.com
ReplyDelete